
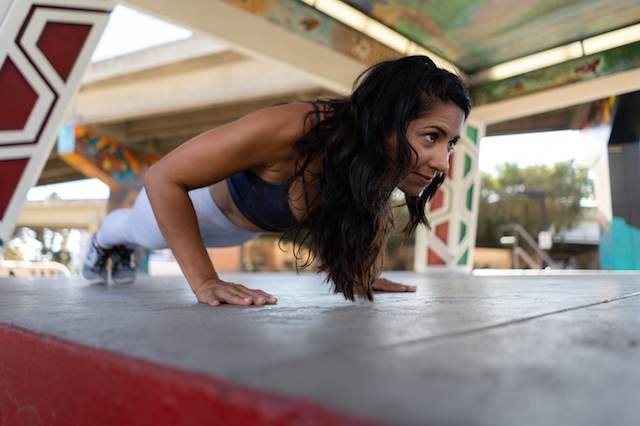
Newsflash: Your push-up ability isn’t limited to how strong your arms are. Sure, upper body strength has a lot to do with it, but there is a lot more to the push-up than that. There are lots of other muscles involved, it can be progressed or regressed numerous ways, and it’s one hell of an exercise worth your time.
“Girly” push-ups, or the ones done on your knees, are rarely good options for improving strength or technique in the push-up. For whatever reason, society continues to coddle girls and women with these knee push-ups instead of simply educating them on the traditional push-up.
Which brings us to this article…
Practicing the push-up with elevated hands will always be my go-to method for the majority of my clients. However, I’ve found that I can still improve my clients’ push-up strength and mechanics without drilling the exercise into their routine in a few different ways.
Quick Anatomy
First, the nerdy stuff (this is important!). While the push-up develops the chest muscles (the agonist muscles of this exercise), there is a whole lot more involved in the push-up than meets the eye.
The rhomboids, posterior deltoids, and trapezius play a role as antagonist muscles, or the muscles that oppose the agonist chest muscles. Then there are the synergists, the supporters and unsung heroes that play a role, like the anterior deltoid, triceps, serrates, core muscles, etc.
Then you have the glutes, quads and hamstrings. When we fire those up, the exercise feels a full-body exercise and is easier to execute. With that in mind, here are four rules to achieving push-up greatness without actually doing the push-up
Four Rules to Push-up Greatness
Rule #1 Body Positioning is everything!
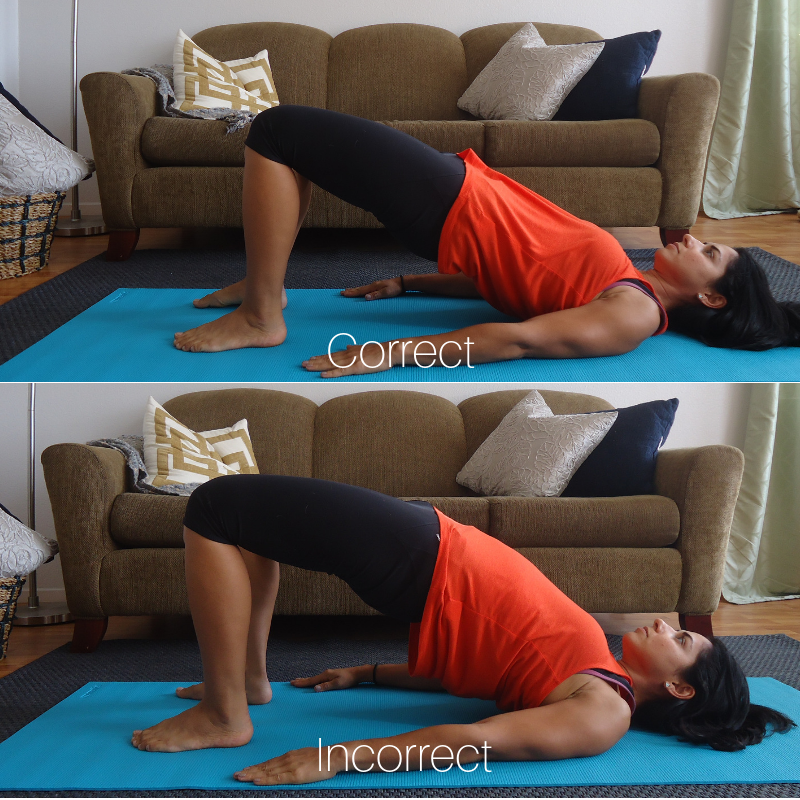
How you set up for your push-up will determine how successful you’ll be with it in the long-run, which means your body positioning is every thing! Look at my client below:

In the top photo, she is set up with stability and control throughout her core, back, shoulders, and hips. In the second photo, she lets her hips and core stability go, which leaves her arms and shoulder blades to hold up her bodyweight. If she executed her push-up looking like the bottom photo, she wouldn’t get very far!
So here’s how I want you to handle your body positioning at the top of the push-up:
- Start on your toes with hands slightly wider than the shoulders
- Take a deep 360-degree breath to fire up your core, glutes, and thighs
- Activate the legs and pelvic floor muscles even more by either squeezing your legs and glutes together or making them magnetize together (in the picture above, my client isn’t squeezing her legs together but I made her “turn them on”)
- Hold this position with all that tension running up and down your body for 10-20 seconds. Yes, it’s like a plank and that’s where you’ll start.
- Repeat steps 1-4 while descending into your push-up and pressing out, being mindful that the hips don’t sag, there’s no arching in the low back, and your head doesn’t fall forward.
Rule #2 Bring the hips to the party
By now you’ve guessed it, your hips play a critical role in your push-up. This type of lumbo-pelvic control is critical in order to stabilize the spine and hip area. They include the deep core muscles that wrap around the spine, glutes, hips and the pelvic floor muscles.
This is why activating that core and developing the glutes are so important for a strong, successful push-up! Most people don’t know how to “feel” those muscles, which is when I bring a little Pilates magic into the mix.
Here’s how to “feel” that lumbo-pelvic control in your body:
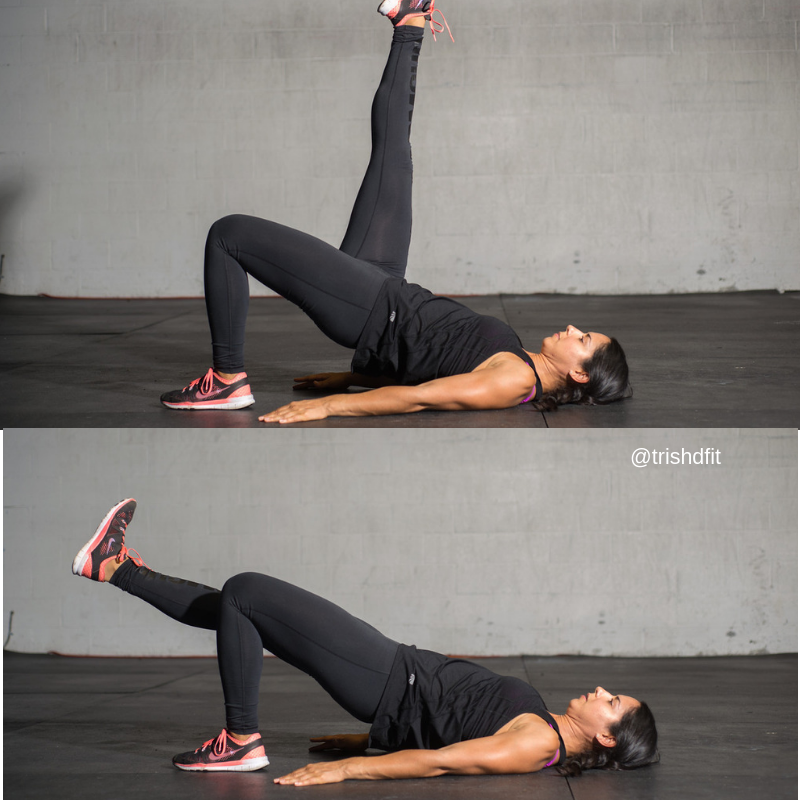
- Place a small ball underneath your sacrum or tailbone, with knees bent, feet flat, and arms by your hips
- Breathe in deeply and press your low belly into the ball as you lift one leg up into tabletop
- Lower it down and switch sides
- Do 3 sets of 10 marches, slow and controlled, without rocking the hips or pelvis
- Progression: Lift both legs straight in the air and press your arms by your side. Scissor the legs slowly while maintaining complete control of your pelvis on the ball. Don’t make this about ROM, but about pelvic stability!
- Do the progression for 3×10. You should feel all those deep muscles in your core and pelvic floor light up as you do this. It’s not easy but it teaches you how to feel and engage it
Watch the video for a few ways to practice this (Shown here: Single leg marches, lower and lift, circles)
It may not seem like this exercise has direct carryover to your push-up but it does. If you can’t maintain control of your pelvis or hips, then you can’t do a good push-up. The ball offers external feedback for anyone who lacks lumbo-pelvic control and I find it super helpful with post-natal women especially.
Rule #3 The shoulder girdle sits in the passenger seat at all times
Remember how important body positioning and pelvic stability is to the push-up? Well, so is scapular control and stability.
Going back to the photo of my client above, the moment she loses her body positioning and lets her hips sag, is the moment that she puts her shoulder blades in a precarious position. Because now her arms and scapula have to figure out how to execute a bodyweight movement (read: 120+lbs) all by their tiny selves!
Your shoulder blades aren’t a muscle; they’re not meant to drive the push-up car. They are passengers. They sit in the back seat, never touch the radio, and do as they are told. They don’t even navigate!
Scapaular control and stability is a learned skill for 99% of the population. The serrates anterior, which is a muscle you can’t even see, functions to upwardly rotate the shoulder blade and helps anchor the shoulder blade during the push-up so that the scapula doesn’t collapse inwards. If you don’t take control of this important function, it will bite you in the butt later on. Speaking from experience here…
Rule #4 Train your core muscles for strength and control, not just a six-pack
Core strength in the push-up implies that all the muscles in the trunk are fired up to help protect the spine and prevent the hips from sagging. Therefore, doing crunches is doing little to help build your push-up strength. Instead, exercises like farmer’s carries, and other anti-extension/anti-flexion core exercises are key to your training. If you want do do crunches at the end of your workout, go ahead. However, what is keeping your sh*t together in the push-up are the deep muscles in the trunk – front, back, and side to side – not your six-pack muscles!
5 Exercises To Improve Your Push-Up without Doing Push-ups!
By now we have what we need to be a push-up machine, so now here are five exercises to help you build up on all the rules above.
Serratus push-up plus
Perks: This exercise helps you find and strengthen your serratus anterior.
Key points:
- Keep your body in a straight line and avoid dropping your head or hips, or bending at the elbows.
- Corkscrew your arms into the ground and feel like you’re trying to squeeze an orange underneath your armpits
- Draw the shoulder blades together and then glide them away
- Maintain tension throughout the entire body as you do this
- Repeat 2-3 sets 10x
Glute bridges (loaded and unloaded)
Perks: Strengthen your glutes and hamstrings, learn how to activate it in a push-up or plank position
Key points:
- This isn’t about getting a big booty, although that can help. Make this about making the mental connection to your glutes.
- Use the cue “wrap your glutes together”
- Pause at the top of each rep, making a line from the top of your knees to your shoulders. No arching of the low back
- If you have short legs, prop your feet up on a plate to give you more ROM
- Repeat 3×10
You can also progress this exercise to make about pelvis control as well:
- Assume same setup as the glute bridge above
- Lift the hips up and lift one leg up straight. Make sure pelvis and hips are table
- Slowly lower the leg 3 times without rocking the hips
- Repeat on the other side
Farmer’s Carry
Perks: As if you needed more reasons to do a farmer’s carry! You get a lot of core stability and strength with this one, plus the added benefit of improving grip strentgth which translates into all your lifting and pull-up exercises.
Key points:
- Avoid walking too fast or using too light a weight
- You grip should be challenged as well
- Take a 360-degree breath before walking and keep the arms from swinging
- Go slow!
Hollow Body Holds
Perks: This is a great exercise to develop core strength and it will carryover into other exercises as well.
Key points:
- Glue the legs together like they are suction cups
- Wrap the glutes together
- Push the legs into your pelvis as you float them off the floor
- Arms and legs should hover off the floor, not lift as high as possible
- While most of the burn will come from your core, you should feel a lot of tension between the thighs as well
Side plank with rows
Perks: This advanced movement is a double whammy – core strength + control with scapular control.
Key points:
- Make this about the quality of movement, not how heavy the pull is
- As you do this exercise, keep the hips lifted and avoid sinking into your shoulder or elbow
- Focus on retracting your shoulder blades with control, not yanking the cable or band toward you
These exercises are a great way to build up the upper body strength and the other pillars of the push-up without training the exercise itself. However, the best way to improve your push-up is to keep practicing the push-up, assuming you’re also working on the pillars that make this exercise so great!
Want more practical tips to get strong and resilient? Join the VIP list! Get exclusive content, weekly updates, and bonus materials.